The secret to growing healthy plants
What’s the secret to growing healthy plants – one that will give you splendid vegetables?! The secret is in starting off on the right foot. In this article, we will share our seed starting tips, tricks and other best practices so that (in most cases) 4 weeks after starting them indoors, you will have healthy seedlings that you can then transplant into your main growing area!
But wait! What does ‘seed starting’ mean!?
Seed starting refers to the act of planting seeds of certain vegetables indoors in a soilless medium. We plant indoors, or in a controlled environment, to give the young ‘seedlings’ (‘seedlings’ (or ‘saplings’ or ‘transplants’) are the baby plants that seeds develop into) a safe environment – free from excessive wind, temperatures, and harsh weather conditions – in which to grow. After about 4 weeks (for most veggies) of growing young seedlings indoors, they are then transplanted into your main growing area like a container or raised-bed, and in a different growing medium – one that is soil-based and contains compost.
Why start seeds indoors?
We start seeds indoors for three main reasons:
1. To grow young plants / seedlings in a controlled, protected environment to increase their chance of survival
2. To get an early start on the season. For example, for someone living in Dubai, one could plant broccoli in early October, and then after 30 days move them outdoors in November so that they enjoy the cooler, mid-twenties weather.
3. Finally, because some vegetables grow better when planted as saplings as opposed to being sown directly as seeds.
...Starting our seeds grows our capacity to grow into our deepest, richest selves.
Petra Page-Mann Tweet
What plants should you NOT start indoors?
You can start most seeds indoors, except for those that don’t do well as transplants. Therefore, the seeds to NOT start indoors are root vegetables like radish, carrot, turnips; others that work better sown directly in your main growing area are curcurbits like melons, zucchini, squash, karela and bottlegourds; and still others that you ought not to start indoors are beans and corn.
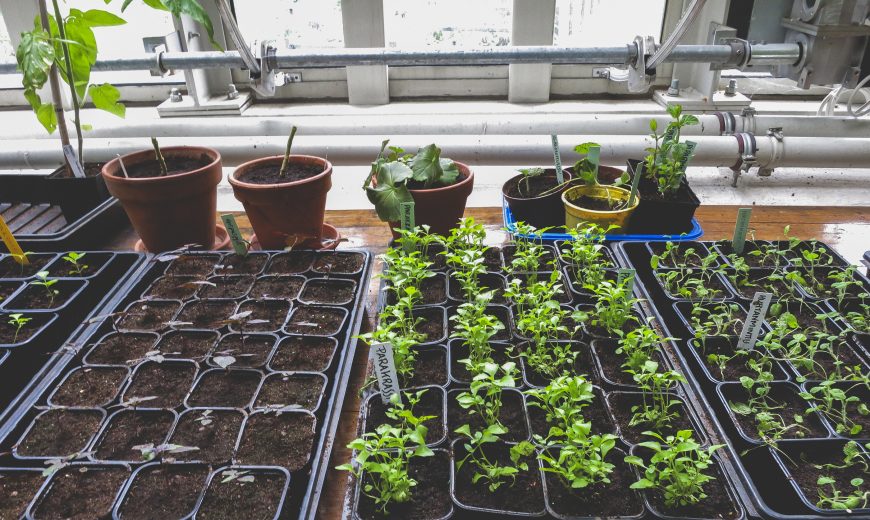
Seed starting supplies
🌱 Potting cell trays
🌟 Tub (to contain and prepare potting mix)
🌱 Bottom trays (to bottom-water potting cells)
🌟 Labels
🌱 Marker
🌟 Potting table (or high surface)
🌱 LED lights (if you lack access to natural light – greenhouse or south-facing window)
For your seed-starting mix:
🌟a. vermiculite OR perlite
🌱 b. peat moss or coco coir or coco peat
🌟 c. (if you don’t want to make your own mix with a. and b., then use) a readymade seed-starting mix
Seed starting mix recipe: how to prepare your mix

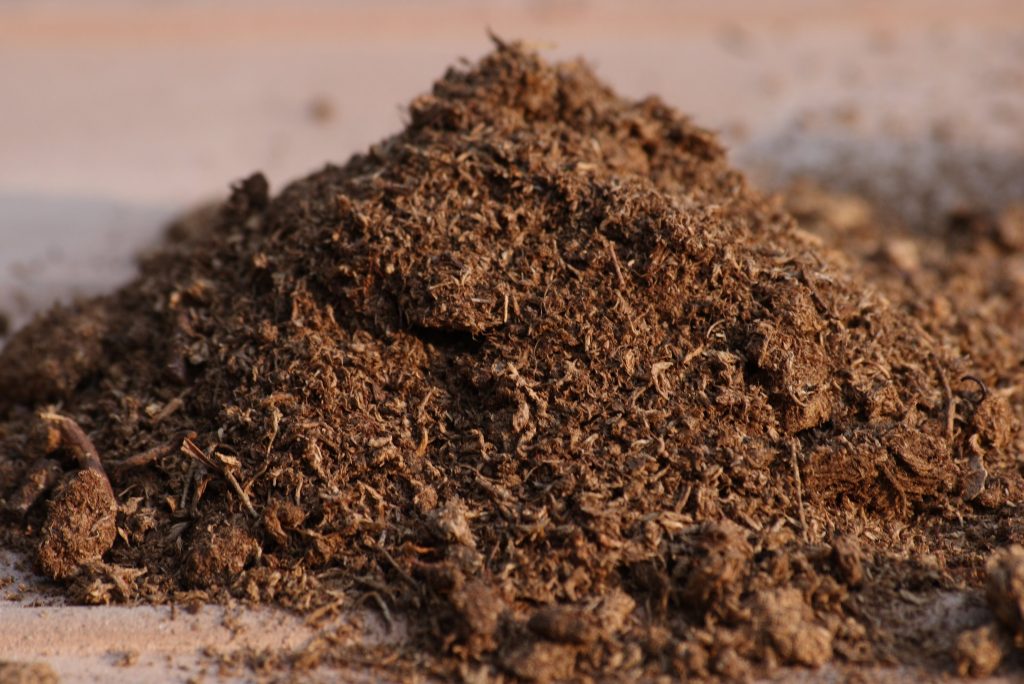
1- Thoroughly wet your mix using lukewarm water. You will use approximately 1 litre water in 20 litres potting mix. Ensure the mix is wet, but not dripping wet.
2- Fill your potting cell trays fully with your wet potting mix. Tap the potting cell trays on your working surface/potting table a few times (from about 5cm up) to allow the potting mix to settle.
3- Top-up with more potting mix until each cell is full.
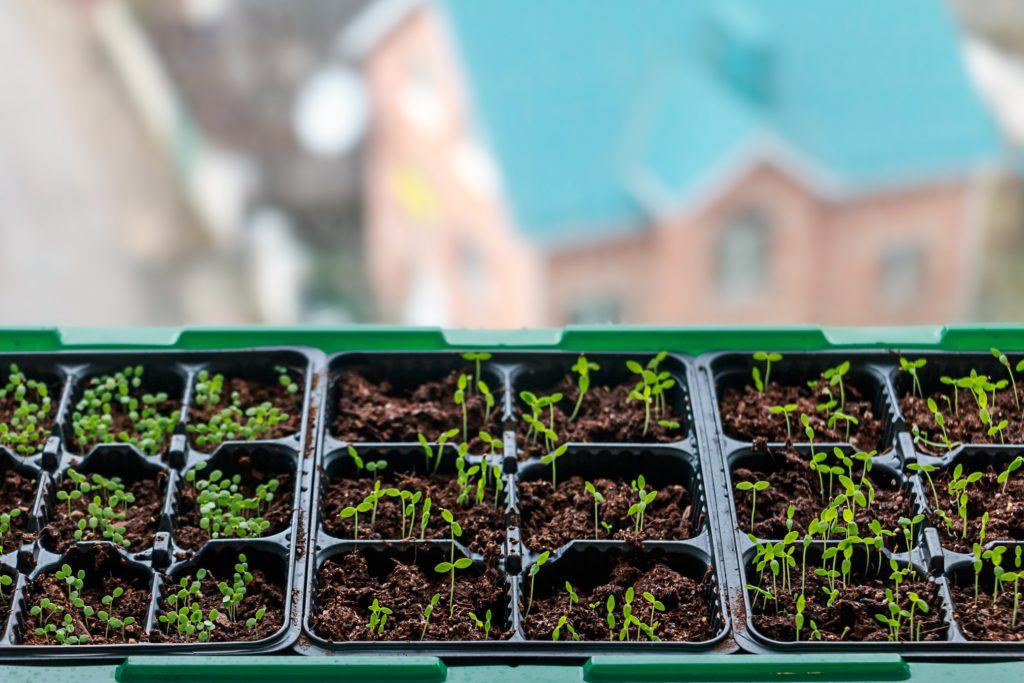
How to start seeds indoors – step-by-step
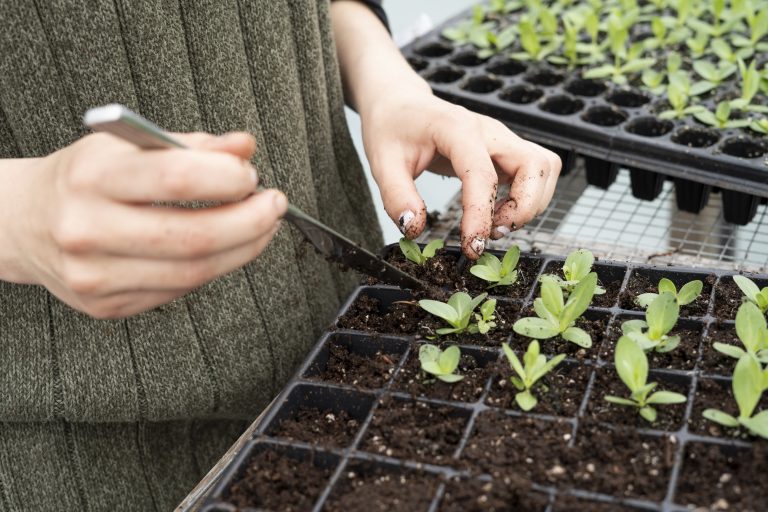
1. Label your potting cell tray (use an ice cream stick) with the plant name, variety name and date of planting (for example: ‘Kale – Dinosaur – 15/10/2020’). Also make a note in your journal or computer.
2. Make a small indent in the soil with your finger and then drop two to three seeds in each cell. You will later ‘thin’ the emergent saplings (by snipping with scissors) 2 to 3 weeks from the date of sowing, so you only have one plant per cell (except for spring onions, arugula and radish that may be multi-sown with 3-4 in the cell transplanted fully into your main growing area)
3. Once the seeds are sown, cover lightly with your seed-starting mix
4. ‘Bottom water’ your potting cells by placing water in the bottom-tray, allowing the cells to take up the water from its bottom holes. Place your potting cell trays in water like this for about 20 minutes; afterwards, throw the water out of the tray
5. Keep your soil moist at all times. Check daily and water using the bottom-watering method before the soil dries.
6. Once your seeds have germinated, make sure they have as much light as possible. You can do this in one of three ways: placing in a greenhouse, by placing by a south-facing window that receives plenty of light, or by using full-spectrum LED lights placed 10-30cm above the saplings.
CHECK OUT THIS TIMELAPSE FOR HOW SPINACH SEEDS GERMINATE AND GROW OVER 30 DAYS! SO COOL!
7. Thin your saplings 2-3 weeks from sowing by using scissors – see point 2 above
8. After Week 3, you can feed your saplings with a weekly fish emulsion/seaweed fertilizer
9. Harden off your transplants a week before planting them into your main growing area so that they get used to being outdoors. Do this by gradually introducing them to the outside, for an hour or two daily. Every day, increase the time they spend outside by an hour or two. Avoid placing them outside during windy or especially hot or cold weather. By the end of the week, your transplants will be ready to be planted into your main growing area
More Seed Starting Hacks and Advice!

1. 🌞🆚💡 When providing light for your starts/seedlings, I personally prefer natural lighting in a greenhouse where we are able to maintain cool temperatures. However, if you don’t have a greenhouse, choose a bright sunny window or artificial lighting also work well. If picking artificial lighting, what should you look for?
1. Full-spectrum lighting as opposed to exclusively “cool blue” or “warm red”
2. Pick a full-spectrum light with a Kelvin rating of 5000-7000K (blue colour) to promote vegetative growth, and 3,500 – 4,500K (red colour) to promote fruiting and flowering.
3. A Lumens rating of around 2,000. Lumens measures the total quantity of visible light emitted from the grow light, and you want to avoid too high a lumens rating.
Keep shining y’all! 😎
2. 🎇🎇 How do you sow very small seeds?! The seeds of lettuce, green onion and arugula are all very tiny. So how do you pick just a couple to sow in each potting cell?! Don’t just use your fingers.. instead, grab a stick with a tiny edge (ideally a toothpick) and wet one end in water. The adhesive force the water allows you to pick up only a few seeds on the toothpick which you can then lower directly into the seed starting mix in your potting cell!
3. ✂️🌱 Snip, don’t rip. When ‘thinning’ your seedlings so you only have one seedling per potting cell, it is better to use scissors and cut them off at the level of the soil than to pull out the extra seedlings with your fingers. This is because pulling them out disturbs the surrounding soil and can damage the delicate roots of the neighbouring sapling!
This growing season, get your plants started off on the right foot. Follow the steps above to give your veggies the head start they need.
Desert Broccoli: How to grow broccoli at home in the desert - our top tips - SoWeGrow
November 24, 2020[…] If growing outdoors, transplant outdoors in the ‘cool season’. This means you will need to ‘start your broccoli seeds’ 4 weeks earlier indoors. […]
Gardening Resolutions: 7 No-Brainer Reasons to Grow a Garden in 2021 - SoWeGrow
April 8, 2021[…] Some of our most-read blog articles are great for beginner gardeners – such as starting seeds indoors, ensuring a thriving garden in the summer heat, managing pests organically, and having a garden […]
https://yoga-world.org
April 30, 2021https://yoga-world.org
Appreciate the recommendation. Will try it out.
Sabrina Rajendra
May 27, 2021How to grow vegetables like tomato 🍅and onions 🌰, brinjal 🍆lady finger these all I seeded but it not come pls tell me how keep the soil and I staying in qatar now it’s too hot
Nasser
March 11, 2022Hi, please go ahead and download the “Organic Gardening Checklist” for free. If you would like specific instruction to grow using a written guide then I recommend “The Gardening Secrets Blueprint”. If you would like a video course, with mentorship from our experts, then “The Organic Gardening Expert” is your best bet. It’s got a ton of features. Good luck!